Saturday, June 28, 2008

American Pride


I'm PROUD to be an American! And I love the Red, White and Blue. The Blue Ribbon paper pack from Close To My Heart is the perfect paper for any 4th of July pictures. I love the stickers too.
This year I want to take lots of pictures and put them into this circle album, also by Close To My Heart.
The next two layouts are from past years. My favorite tradition is to buy patriotic shirts for the whole family and then take a picture by our Flag. Some day I want to frame our flag and put it in our family room. How cool would that be?


Happy 4th, show your pride!

P.S make sure you scroll down to my play list to activate the GOD BLESS THE USA!


Tuesday, June 24, 2008

Round Robin


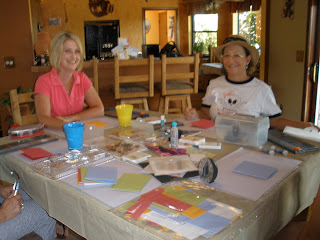
This game is so much fun to do and it's so neat to see every one's creative side. It's called Round Robin and I saw it first on a SIS TV episode, only they did scrapbooking pages. Haven't tried that, but the cards seem to be less intimidating, but still gets those creative juices flowing.

When doing cards, I feel that you need to have a group of no more than 5. If you have a larger group, than break off to smaller groups.
Setting Up you will need: One card base for each person, different color cardstock scraps, different pattern paper (that coordinates), variety of stamps and inks, embellishments such as, buttons, brads, ribbon, ribbon, distressing tools, scissors, punches, a variety of adhesives and a timer. I put all these things in the middle of the table for everyone to reach.

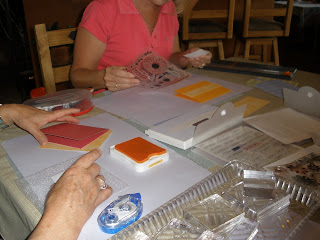
1. Everyone picks their card base to start. The time keeper sets the timer (I usually do 2 minutes, depending on how many people). You get two minutes to start a step on the card. Beware, not to do too much the first step, for when it gets to the last person, they need to be able to do something too. The Step is up to the creator. They may choose to random stamp on the base or they may want to distress the base or they may want to stamp on a separate piece of cardstock to cut out.
Tip: I don't let anyone glue anything to the card base till the last step, that way there is more freedom for the others to create on the card as they choose and it gives the last person with the card something to do.
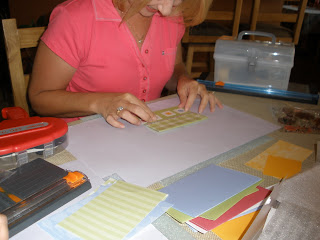
2. After the 2 minutes are up you let everyone finish their design process and then everyone passes their card to the left. Now you will be adding a step to the card that the person next to you started. Again, each person adds their touch to the card. It can be more stamping, distressing, adding a different piece of paper, using the decorative scissors, or maybe coloring in a design.
3. 2 minutes are up, pass the card again to the left and create some more.
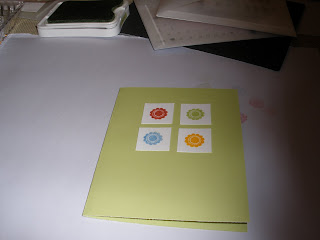
4. Again pass the card to the left, at this point the card will be getting close to done. Before it returns to the person that started the card, it needs to be finished. This is when it should be all glued down. After the 2 minutes are up, the next step is passing it to the person who created the card.
I love to see what everyone does with the card that I start. I might have a vision of what I see my card to be and start to design it a certain way, but by the time I get my card back, it has gone a totally different way. Which is so cool, because I think, Wow, I never thought to do that. Now you have a card that all your friends helped create.

Thursday, June 19, 2008

PICTURE CUTOUTS


I saw that these cutouts were offered by a photography studio for a pretty steep price. This is when my wheels start turning and I think, hmmm I wonder if I can make one of those. Yes, yes I can and here they are. I think they turned out good and the kids think they are cool.
Here is what you need: 1. A photo with a image that would be good to cut around. I cropped my photo so that the cutout would be about 7" high (5 x 7 photo). 2. Mat board or you could even use foam board. 3. Cutting knife 4. Adhesive 5. a file or emery board.
Directions: Cut out image, glue to the mat board or foam board.
Cut out using a cutting knife. This is the hardest part of the project and the most time consuming. It takes several passes with the knife.
Use a File or emery board to file rough edges.
Make a stand: I cut out two pieces of the board and glued them back to back and then adhere to back of picture. Just play around with the size and shape to get it to stand properly.
Have fun, I would love to see what you create.

Friday, June 13, 2008

Scrapbook in a box


I love this cute little box idea that I got from Fiskars craft TV. The box is from a 12 x 12 piece of Close To My Heart cardstock. They recommend using chip board. I think our cardstock works well too. Paper is from the Laid Back My Reflections paper pack from Close To My Heart. For the lid, I used a 7 x 7 square and scored on 1 3/8 all the way around. I also made one for my son's teacher with pictures from the school year and then put a gift card inside. So many great possibilities.


Thursday, June 12, 2008

Mother's Day at Saguaro Lake


It was such a beautiful day. We all had such a nice time together. I wasn't sure if we would be able to do some water skiing, but we did. The kids looked for shells on the beach and splashed around in the water. Jay and Heather's Jet Ski was a big hit with everyone too. The adults were a little rusty on the skis, but we all made it up. Some (Dave) stayed on longer than the rest.

Oh, so this is a blog.

Alright, so after visiting several blogs and being kind of in the dumps about canceling my ScrapPirate.com website, I thought I would jump on the (FREE) blogging band-wagon.
I'll tell you , it's much easier to create a blog then a website. I've had to let go of some creative control issues, but overall I am happy with how it looks.

I am using this site to show off my beautiful family and my art work. After all, they are my life and I do take pride with both. It is also a great place for my family and friends to come and get caught up on what we are doing.

Now, all I have to do is the follow through part. My goal is to stay on top of the updates and I am looking forward to putting up video tutorials in the near future. Oh, just something else I have to figure out.
Happy Summer, Enjoy!